We’re out of capacity!
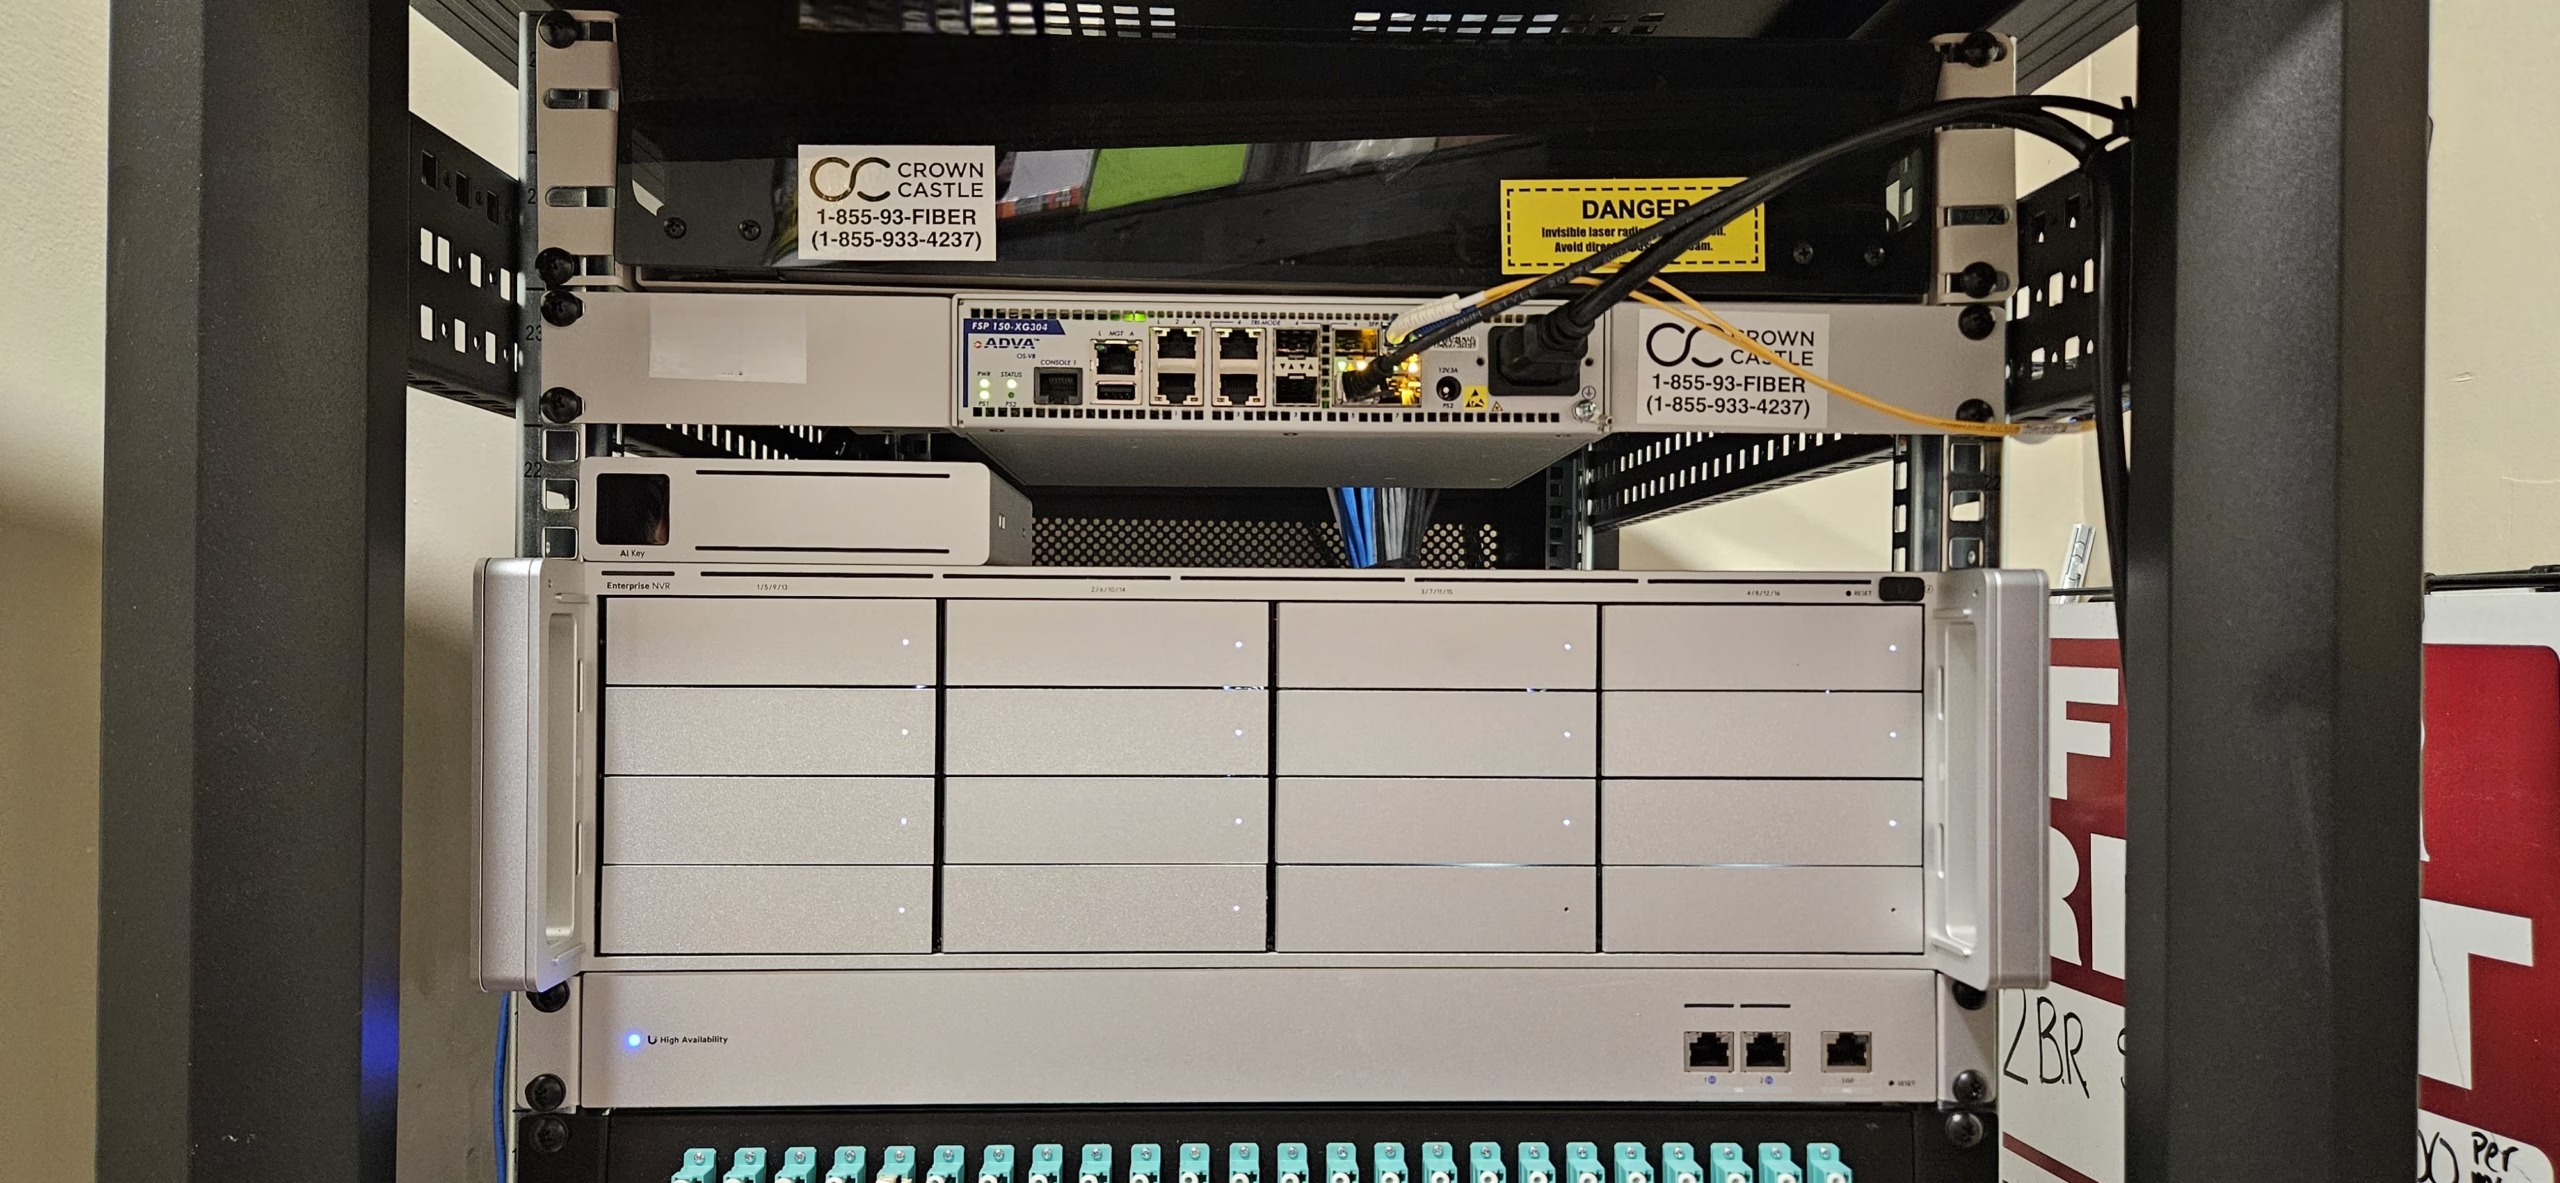
Recently, one of my clients wanted to migrate from a Ubiquiti UNVR Pro to a Ubiquiti Enterprise NVR due to outgrowing the UNVR Pro in their existing deployment. The UNVR Pro was originally purchased when Ubiquiti did not sell cameras exceeding 2K Resolution. The UNVR Pro was also the highest end offering available at the time of purchase. Now, many of their camera offerings provide 4K or Multi-4K Sensors, which have higher compute requirements for the NVR. Ubiquiti has also added UniFi Access for Building access and monitoring, and my client has since added UniFi Access hardware to their setup. Access was never factored into the sizing of the UNVR Pro, but those devices require compute too. Ubiquiti also added devices such as the AI Key and AI Port, which increase database and compute requirements to handle all of the data cataloging the NVR must perform.
Although not a hard requirement of my client and they COULD do without the video footage, the question came up on whether the NVR’s camera footage could be saved. The general answer to this is “Yes, but…” due to a few reasons:
- UniFi Protect records footage and metadata to a proprietary video container and catalogs the recordings into a PostgreSQL database.
- Exporting video footage, especially from a fully loaded UNVR Pro can take days even with the help of scripts. As the export occurs, the UNVR will be overwriting older video which means you may only get one shot to preserve data. This also applies to exporting the proprietary video files out to S3/Glacier storage in the cloud.
- Exporting video within UniFi Protect itself is incredibly slow. We’re talking like 20Mbps slow depending on how you access the console, and how loaded down the console is. Try transferring a 43+TB array worth of video over 20Mbps. It is miserable.
- Given enough time, you *could* have UniFi Protect use the Continuous Archiving feature to export enough camera events to satisfy data retention needs to a SMB share or Cloud Storage account. This feature does not export continuous video recordings, only motion, AI, and other event-based footage.
- Storage costs are astronomical right now. The 8TB Disks which were $180 when initially purchased are now $650+ per disk. In my client’s case, we would need another 7x8TB disks to fully archive the existing array of data with RAID 5 redundancy, buy even larger and more expensive disks for temporary archival, or we would need to leave those disks sitting idle until a sufficient amount of time passes where we can safely destroy the data on the disks.
- UniFi Protect is designed to, and only runs on proprietary appliances made by Ubiquiti. Shoehorning data between appliances over SSH isn’t a documented migration path, and could create all sorts of problems.
So we decided to attempt something which Ubiquiti doesn’t document well, but which works in theory and to our surprise, in practice; physically migrate the storage array to new appliance hardware. But wait, there’s a twist. We need more storage capacity to cover the higher storage requirements of 4K Cameras. We also need to add more drives to the pool without losing data. This could extend our process out by many days, and greatly increase the strain on the disks due to RAID rebuilds.
Why not just stack another UNVR Pro? There’s a few reasons for that too.
- Ubiquiti barely supports stacking UNVR consoles. They don’t recommend stacking, either. Stacking is only a means to add more retention storage.
- Ubiquiti recommends adding multiple UNVR Pros by using the co-located consoles feature combined with the cloud portal’s aggregation capabilities. There are limits when using devices like the Ubiquiti Viewport as to which cameras can be accessed, which is based on what console the Viewport is adopted into.
- Stacking does not distribute compute resources between the consoles. The limitation my client hit is a compute limitation (RAM, CPU), not a storage limitation.
So the option is to buy a bigger console, or distribute additional cameras into a different console.
The migration process.
With all of that said and done, here’s what I did. Fair warning, Ubiquiti does NOT document this process in any way, shape, or form right now. It worked for me, but may not work for you. If you follow this process, do so at your own risk with full understanding that you may lose all of your recordings. At the time of writing for my consoles, UniFi OS is on version 6.0.11, UniFi Protect is 7.2.105, UniFi Access is 4.3.12 and Innerspace is 1.4.1.
- Take a backup of your existing UniFi Protect installation.
- I recommend taking two backups. Save at least one backup to your Ubiquiti Cloud account, and another backup to your computer.
- Ubiquiti’s official documentation on this because they change the UI regularly.
- Shut down your existing console
- UniFi Access tip: The G6 Entry Keypads and other devices have a built-in cache of registered users and fobs. These devices when paired with a Door Access Hub will continue to unlock doors for users while the console is offline. I wouldn’t count on this being a thing, but I did have success in this working.
- Network Note: The backup, if your console is configured with a Static IP address, will configure your replacement console with the same Static IP address. We need the device shut down for this reason as well.
- Shut down note: Because you are working with a live file system, do not just unplug the console from the wall. There is a shutdown button located in the Console’s Admin settings in the Web Interface.
- Remove the disks one at a time. Label each disk with the drive bay it came from.
- This is a technique which comes from working with Hardware RAID. Ubiquiti uses Software RAID via Linux md software RAID. With hardware RAID, many controllers require the disks to be in the disk bay they were originally initialized in for the RAID array to initialize… or import. Linux software RAID does not have such a requirement in practice since metadata in the disk tells md what disk it is, but you never know what Ubiquiti or the Linux community may have modified.
- This is also a good practice in case you need to roll back to the UNVR Pro without running the disk of your array failing to initialize just because the disks are out of order. Again, shouldn’t be a problem as Ubiquiti uses Linux software RAID.
- Rack and power on your new Enterprise NVR without storage installed.
- VERY IMPORTANT: Do not install the disks right now. This is an appliance you are working with. Any number of reasons can cause the appliance to automatically format the disks and destroy everything.
- Follow the initial setup process for the Enterprise NVR. Attempt to restore your backup when prompted.
- Ubiquiti’s official guide on this for reference, since the process changes regularly.
- I configured the Enterprise NVR by identifying the IP address of the console, then by accessing the web interface of the Enterprise NVR. You can probably succeed in doing the rest of the steps from the mobile app. I didn’t try the mobile app.
- The backup in my case took several minutes to restore, with the console seemingly doing nothing in the GUI>
- Speed Bump! Your backup is apparently corrupt. The Cloud backup doesn’t restore, either. What to do?
- Make sure you’ve signed into the Ubiquiti account that is also the owner of the older NVR device you are trying to replace. Ubiquiti does not support “co-ownership” of consoles at this time, and a backup cannot be restored by a non-owner account.
- For “corrupted” errors, most of the time this is because the console you’re attempting to set up is running an older copy of UniFi OS and associated apps than your older NVR. The setup workflow doesn’t account for this. To resolve this, configure the console as a new device by skipping the option to restore from a backup, update all of the software, then Factory Reset the console (another reason why we do not install the disks until later on). Begin the initial setup process again. Your backup should now restore.
- Check the health of your restored backup.
- What I mean by this is to make sure all of your UniFi Access, UniFi Protect, and InnerSpace data has restored itself from the backup. Your cameras, access hubs, SuperLink devices, users, and admins should all be present in their associated applications, and your devices should be re-connecting to the console. Your console should be accessible through the UniFi Cloud portal if you’ve enabled Cloud access.
- The NVR will be very angry that it has no storage to record to. Right now, the device is running via the onboard eMMC / SSD which contains only enough storage to maintain essential services.
- Your cameras should have working video streams.
- Your Door Access devices should be authorizing users and be controllable from Access
- Your SuperLink devices should be connected and reporting events.
- Network Note: Your console will configure itself to the Static IP address your previous console was configured with once your backup is restored.
- Install your *OLD* disks first, one at a time, in order. Leave the console booted!
- Install your first disk from Bay 1 of the old UNVR Pro to Bay 1 of the Enterprise NVR.
- Install your second disk from Bay 2 of the old UNVR Pro to Bay 2 of the Enterprise NVR.
- Repeat this process for all remaining disks you are trying to migrate.
- DO NOT:
- Shut down or reboot the Enterprise UNVR, or restart any applications. Even to install disks. Just don’t do it.
- Touch anything in the administration interfaces. The console will be warning about failed storage.
- After all of your original disks are installed, add your additional disks
- If you are adding storage, populate your additional disks into the remaining drive bays. Order doesn’t matter here.
- Any new disks you are adding *must* be blank! Since in my case we purchased new, identical disks to the original which were coming over from the UNVR Pro, all of the disks were blank. If you are installing used disks, please use a tool like nwipe/ShredOS on a computer to completely zero the disk.
- Return to UniFi Protect. If everything worked, you’ll see a question about existing data
- This is a good sign. If your disk array from the UNVR Pro initialized, UniFi Protect should pop up a message indicating existing data has been located on the disks. You will have two options: Keep running configuration, or use the data found on the disks. You want to use the data found on the disks.
- Before you get to this point, UniFi Protect may become unavailable for a while. When a storage volume is added or removed from a console, Protect will restart.
- This is a point of no rollback. If something goes wrong once you choose the option to use the existing data, the Enterprise NVR will begin to work with the storage volume and data within. Your old disks will not be usable in the old console again without formatting.
- Protect will restart at least once. It may restart itself a few times. Be patient and calm.
- Behind the scenes, here is what is occurring:
- UniFi Protect is restoring the database from the imported disks and reloading
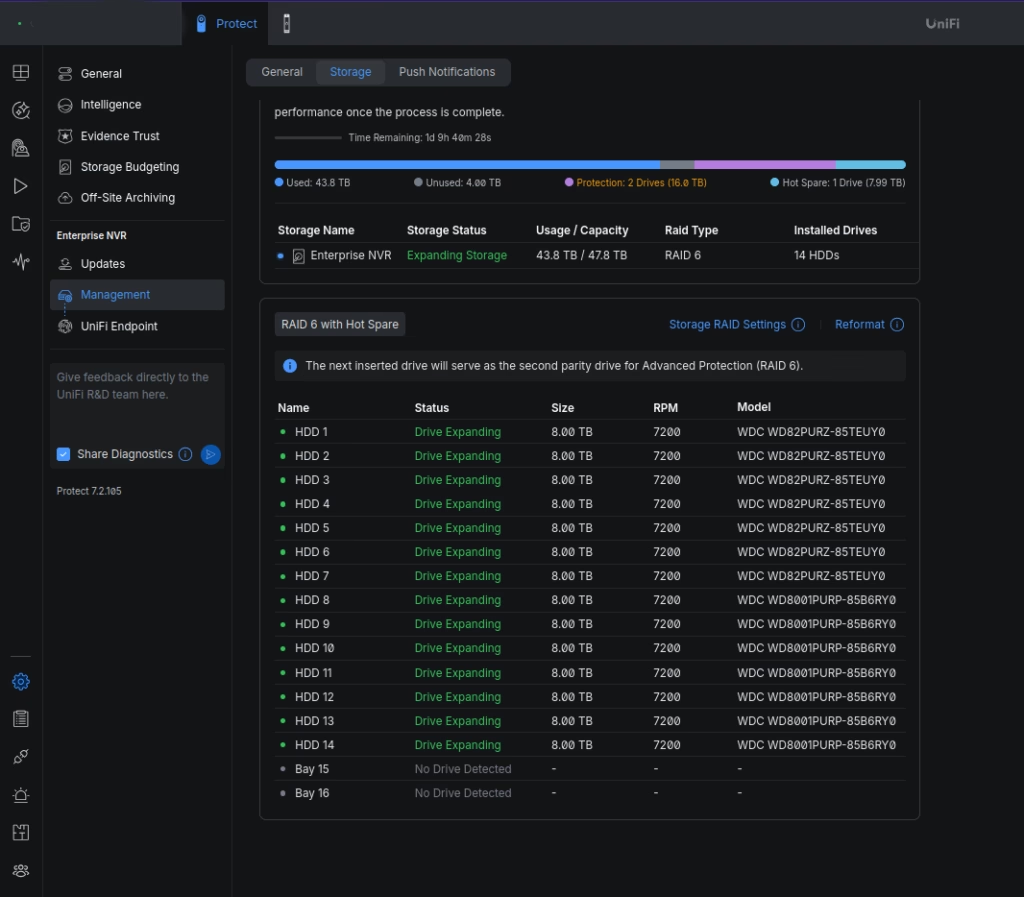
- If you added additional disks to the console, UniFi OS is adding them to the array. This will require the array to re-synchronize as all disks must have their data and parity recalculated and re-written to add additional space to the storage volume. Linux must expand the underlying logical volume and the file system to make the space available.
- If you have added a sufficient number of disks to convert from RAID 5 to RAID 6, or RAID 6 + Hot Spare, or RAID 6 + Hot Spare + Redundancy, UniFi OS will perform a RAID Type Migration from RAID 5 to RAID 6. This process is similar to #2 but with extra steps and more points of failure.
- Under Settings -> Console -> Storage Management, your newly added disks may show “Optimal” instead of “Drive Expanding” while other disks show “Drive Expanding.” This is normal, and should correct itself within a few minutes as the console adds the additional disks.
- Behind the scenes, here is what is occurring:
- Your console’s applications should return to stability.
- At this time, you’ll find Protect may not have metadata or detection data. This is normal. In the background, Protect will restore your existing detection data. You can still view your recordings by scrubbing on the recording timeline, and new recordings will appear normally.
- Monitor the array
- If you added disks, the console will be working in the background to expand your array onto the additional disks. This process can take 1-3 days depending on the size and speed of your disks. During this time, do not reboot or shut down the console for any reason.
- UniFi Protect may ask you if you wish to suspend video recording in order to speed up the array rebuild. What to do here is up to you.
- If you choose to continue recording during the rebuild, Protect may warn about slow storage during the rebuild. Recordings may be slow or unreliable for a period of time.
- Once the rebuild completes, UniFi Protect may require a File System Check. Run the File System Check from the Console’s Storage Management page.
- The console will indicate your storage is “At Risk” at some point during the RAID expansion, and immediately after the expansion completes. As long as none of your disks in the storage management show “At Risk” the problem is not due to your hardware.
- Most of the time, this is because UniFi OS wants to ensure the file system is consistent and in good shape following an expansion of the array. This doesn’t mean your data is corrupted.
- On my console, the file system check took less than two minutes to complete. UniFi Protect restarted during the check. No errors were found with my file system.
- Ensure your console shows healthy Storage, and all of your data is present.
That’s it! Lots of steps, but this is what I did to migrate from a UNVR Pro to an Enterprise NVR while also adding storage, all in one shot. The rack, stack, sled, and initialization took me about 20 minutes, and the disk array took two days from “expanding” to “fully expanded.”
Does this work for other consoles?
This is the initial question I had when to moving from a UNVR Pro to an Enterprise NVR, and I found some evidence of this being possible across Reddit and the Ubiquiti forums prior to trying my upgrade. Apparently, this process works even when moving between a UniFi CloudKey Gen2+ and a UNVR, a CloudKey to a Dream Machine Pro, and from a Dream Machine to a UNVR. It probably works going from a Dream Machine Pro (single disk) to a CloudKey. You can probably do a migration from a Dream Wall or Dream Machine using SD-Card Storage to a console using SATA or NVMe disks by cloning the SD Card onto a blank disk and manually expanding the volume on the new disk prior to installing the drive into the console.
For single disk to multi-disk migrations, Step 9 and Step 11 will move after Step 12 . You’ll insert your single disk, import the data from the disk, then wait for Protect to return to stability. If you have a Dream Machine Max or a UNVR with multiple drive bays, you’ll install your additional *blank* disks to convert the setup from a single disk setup to a RAID 1, RAID 5, or RAID 6. It’s possible to follow my steps with some adjustments as long as you go forward in tiers of RAID.
The only thing you can’t do is go backwards. You cannot go from a multi-disk setup down to less disks without a reformat. That means you can’t go from RAID 6 to RAID 5. You can’t go from RAID 5 down to RAID 1 (two disk, or two disk + hot spare). You can’t go from RAID 1 down to single disk. You shouldn’t try to subtract disks from a Hot spare pool. You’re formatting.
Anyways. That’s. Ubiquiti did some leg work here to make this process as easy as possible, and they deserve a thank you for this from me! Now they just need to document this migration process a bit nicer.